Skip to content
VIZROVIZROSTUDIOHow to use

VIZRO STUDIO · HOW TO USE

See it. Learn it. Create it.

Follow the current website, from registration to saving your design, with real screenshots and numbered steps.

English / অসমীয়াActual captures · 13 Nov; Studio recovery · 17 Nov 2026Product v1.1.0-beta.389

These are real website captures with training content. No private OTP, customer invoice or fabricated payment success is pictured. Controls and colours depend on permissions, templates and appearance.

Choose “Enlarge screenshot” to read small controls. Swipe left/right inside the image; scroll up/down to continue the page. Follow the numbered instructions below.

ACCOUNT

Registration, payment & bills

Individual, News Channel, email OTP and invoices.

Choose a lesson in this section

Lesson 1 / 5 · Register as an Individual
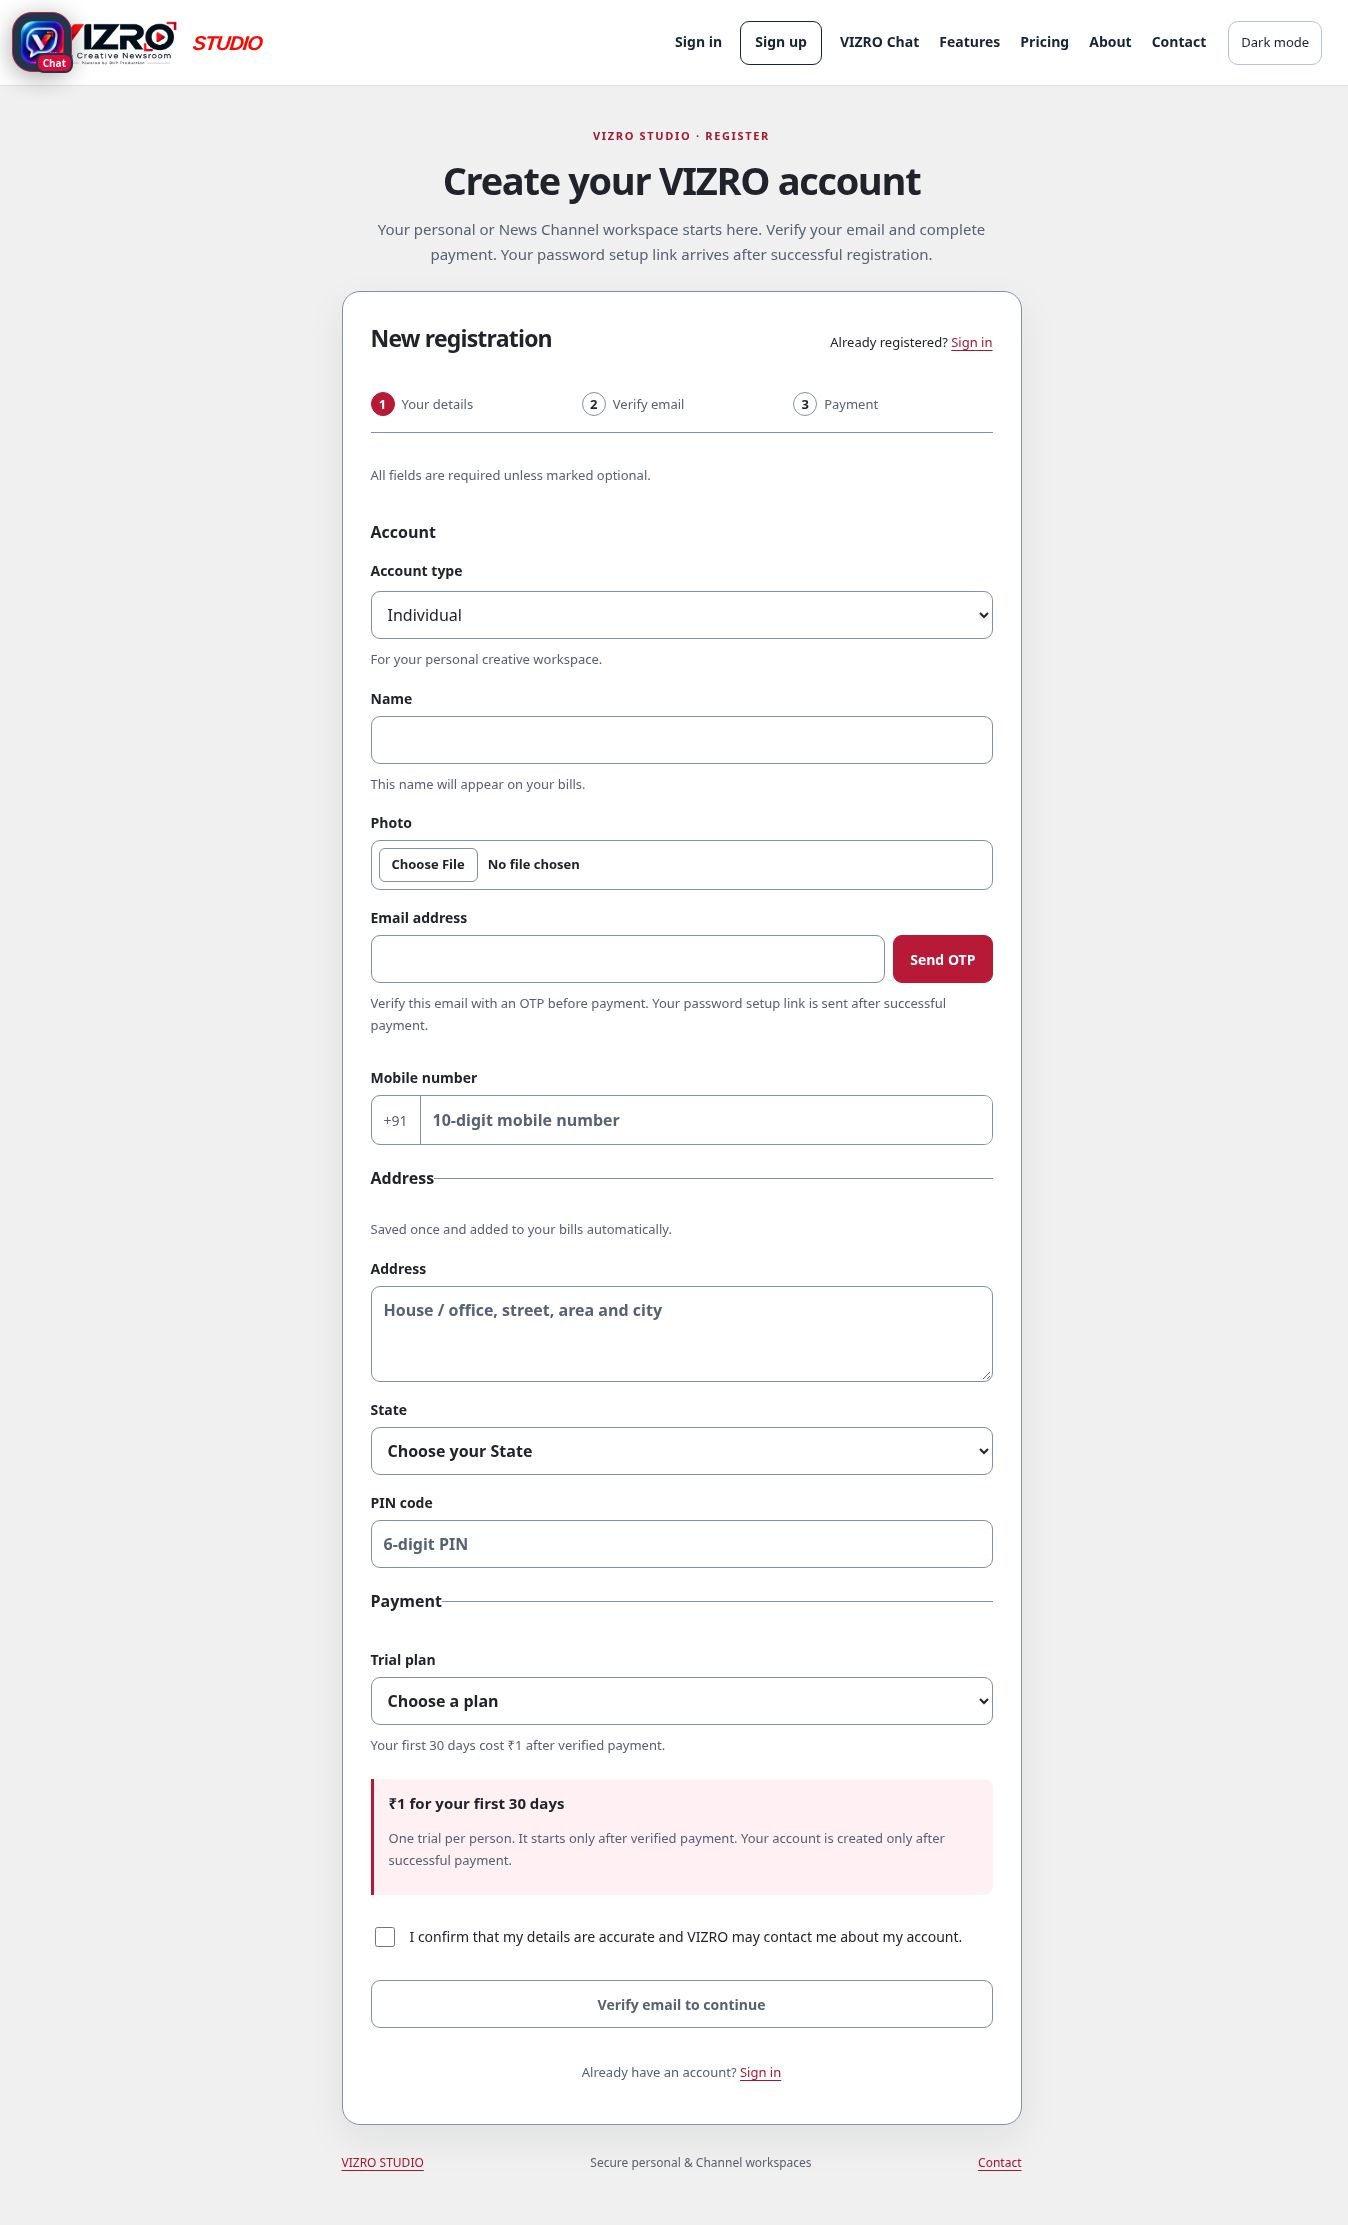
Actual UI: Register as an Individual
  1. Open Sign up and choose Individual. Enter your name; this is the billing name.

  2. Upload your photo, then enter your email and 10-digit mobile number. Mobile OTP is not required.

  3. Enter your address, State and six-digit PIN. These details are added to billing automatically.
Open this page →

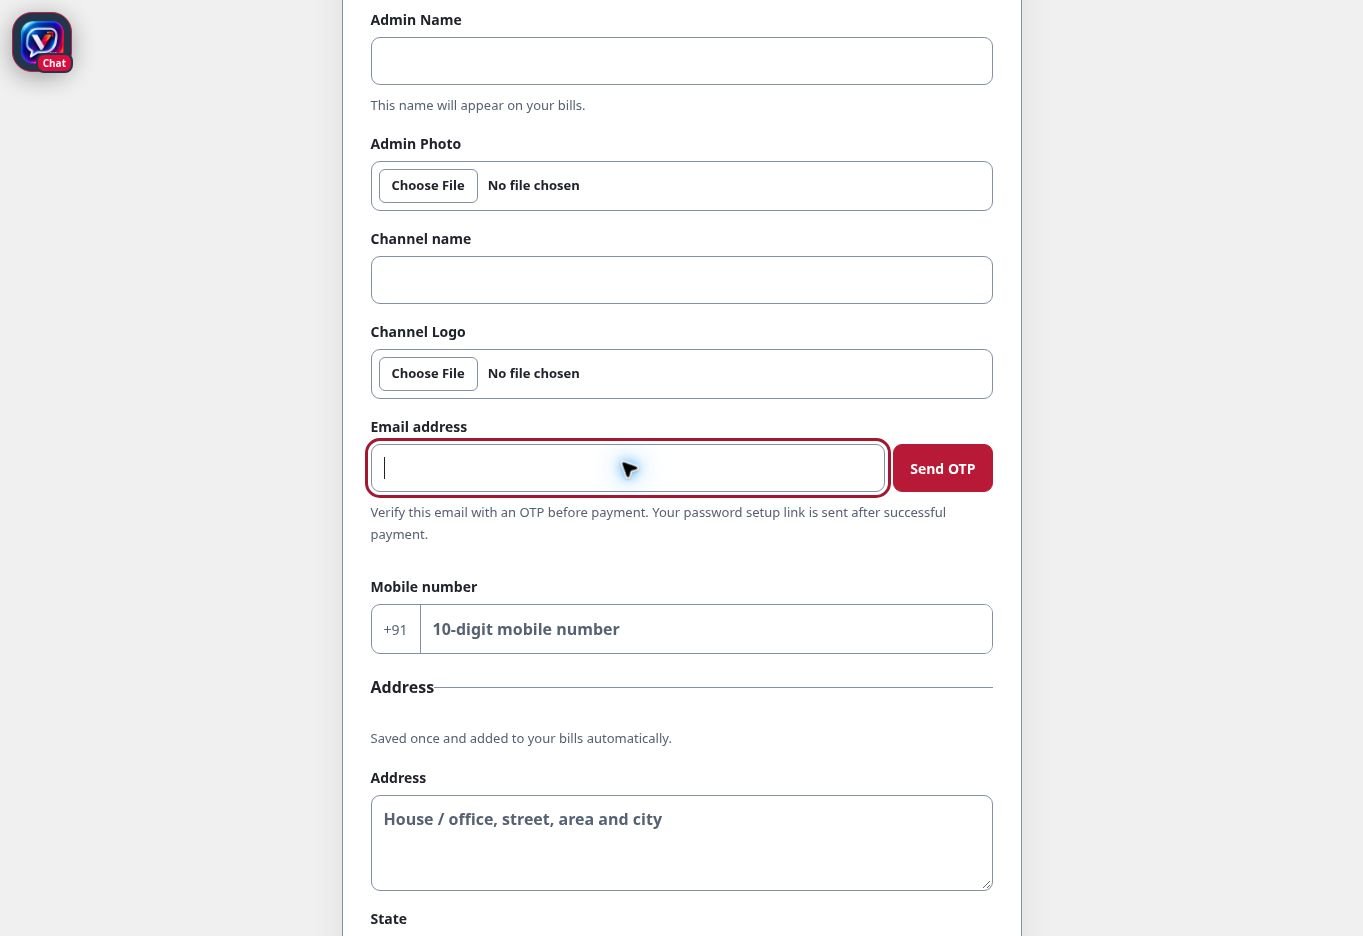
Lesson 2 / 5 · Register a News Channel

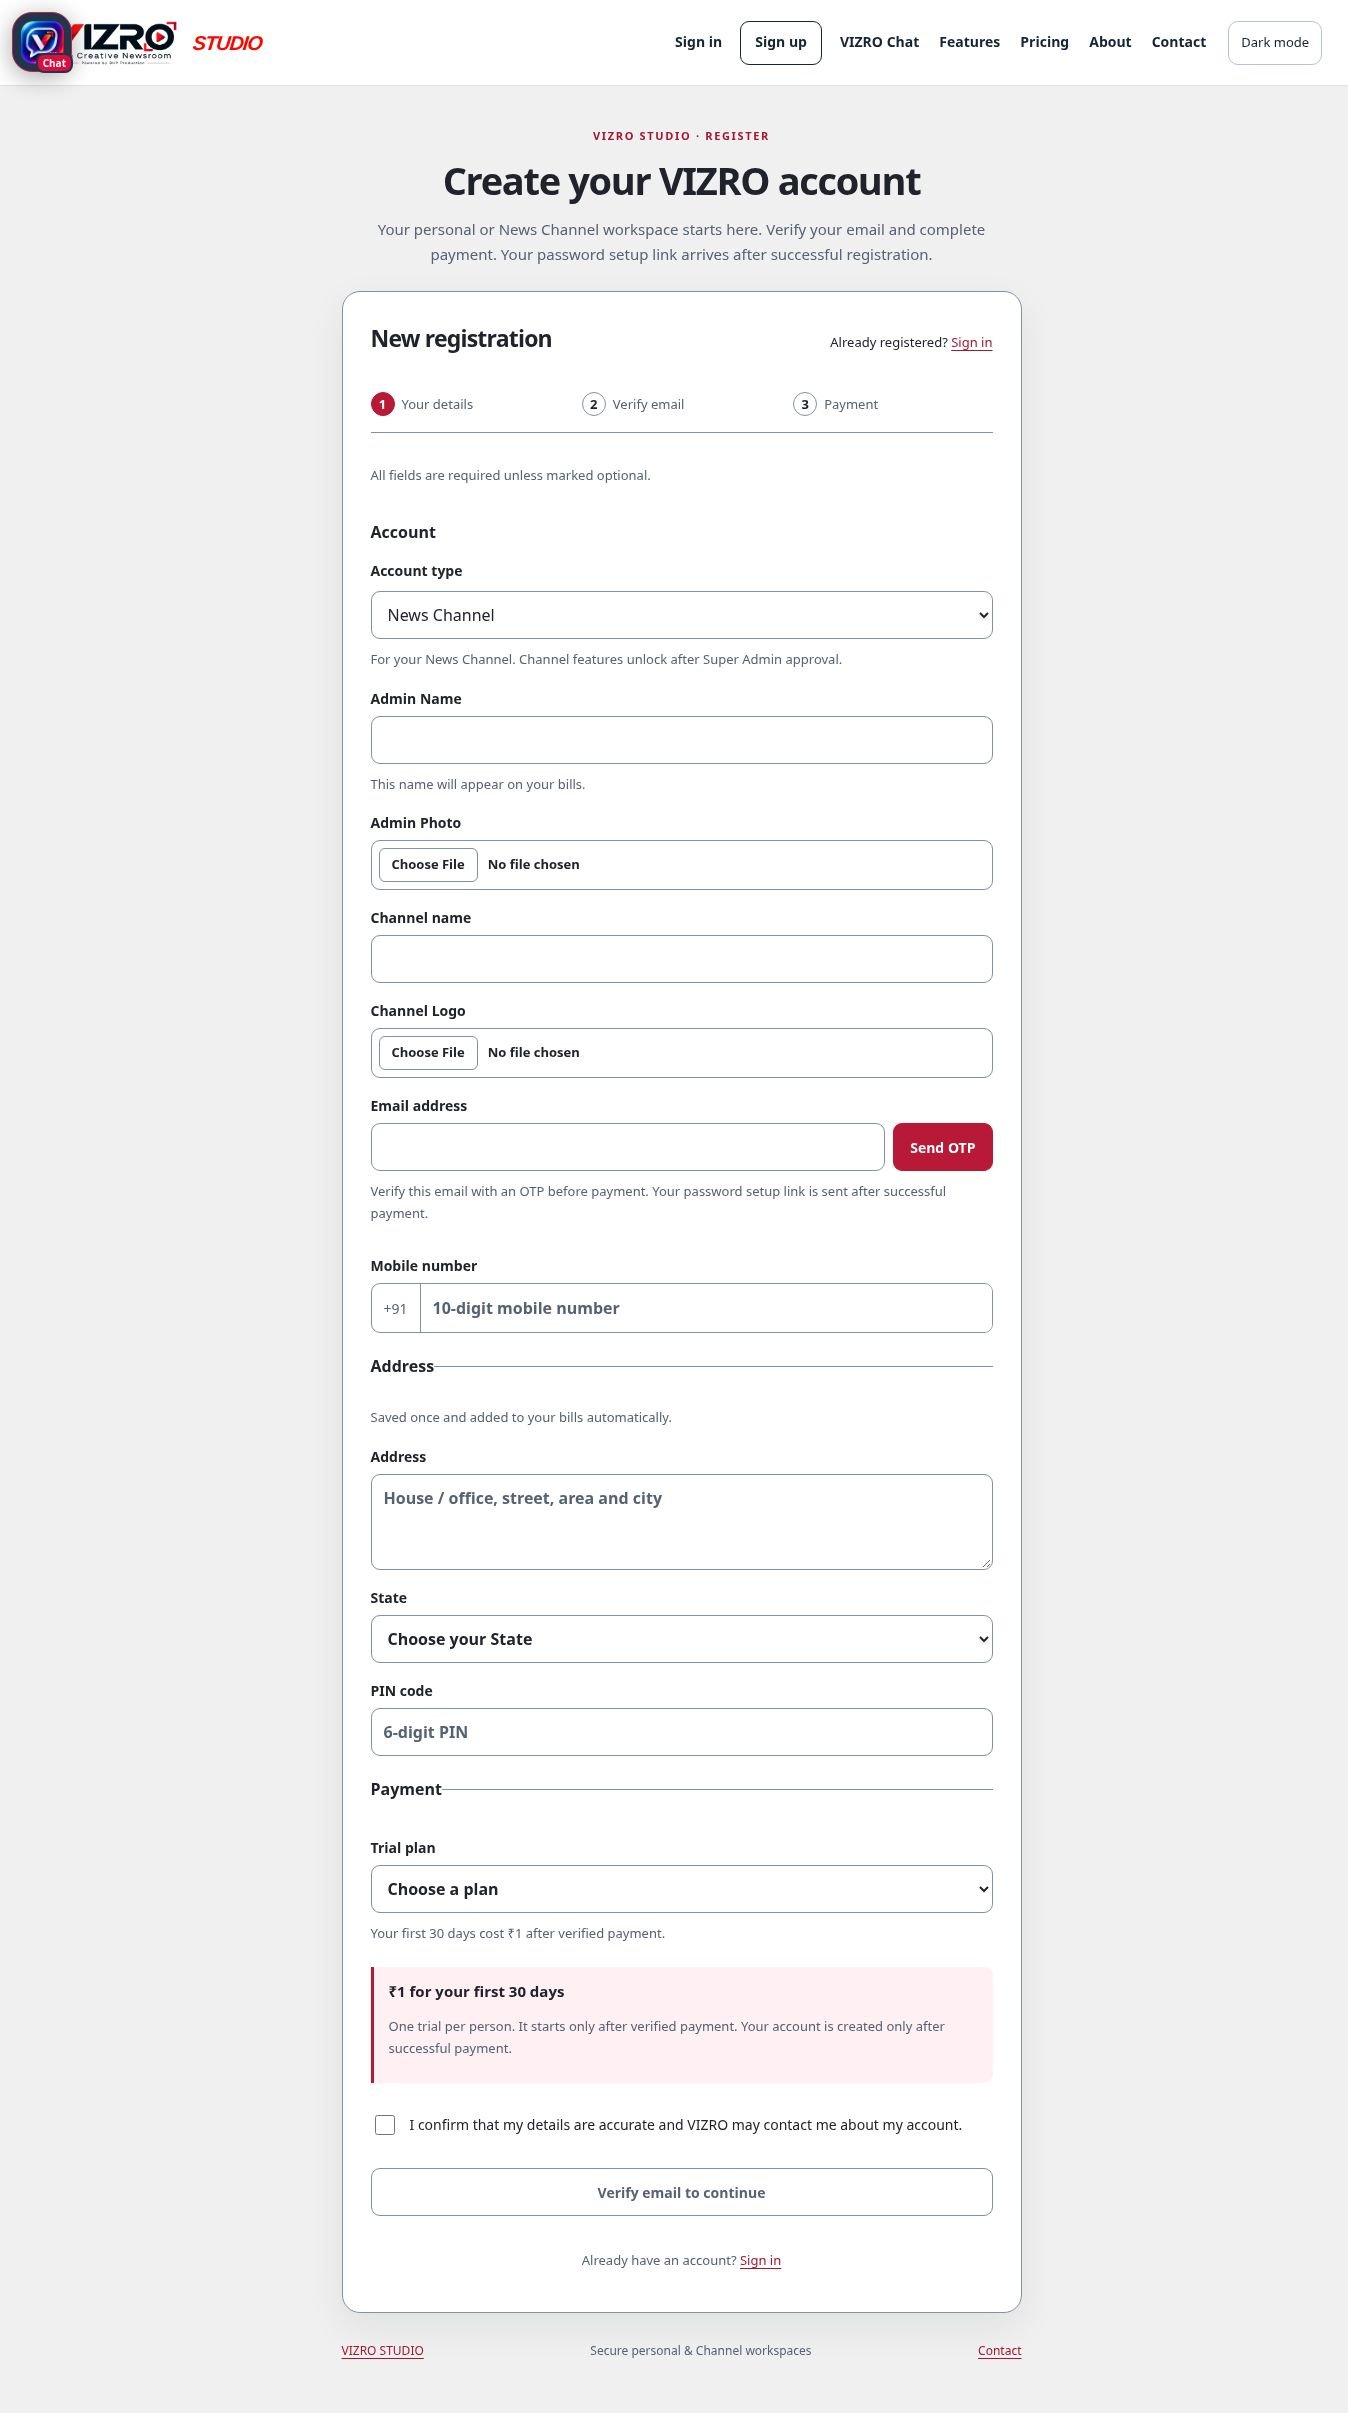
Actual UI: Register a News Channel
  1. Choose News Channel. Enter Admin Name and upload Admin Photo.

  2. Add the Channel name and logo. Complete the same email, mobile and address fields. Photo and logo are required.

  3. Complete email verification and payment. Channel privileges require Super Admin approval; payment alone is not Channel approval.

Open this page →

Lesson 3 / 5 · Verify your email

Actual UI: Verify your email
  1. Enter an email you can access and click Send OTP beside it.

  2. Read the six-digit email code, enter it in Email OTP and click Verify email. Check Spam if the message is missing.

  3. The verified email becomes locked. Use Change email and verify the new address if you need to change it. A code alone does not create an account.

This capture shows the email controls before sending an OTP; no private code or inbox is pictured.

Open this page →

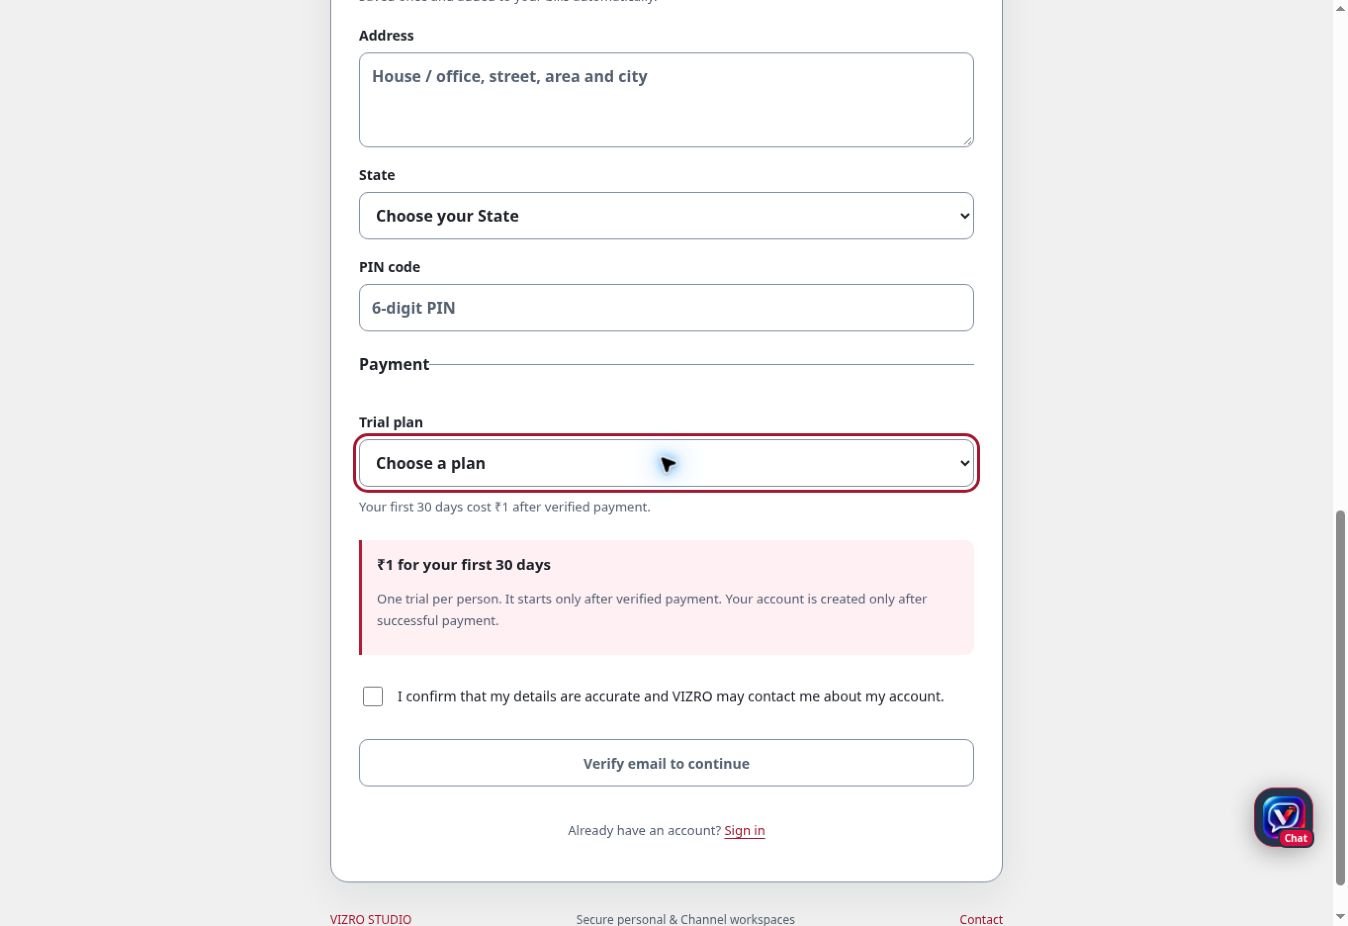
Lesson 4 / 5 · Complete payment and set your password

Actual UI: Complete payment and set your password
  1. Choose the trial plan. Review the ₹1 total for the first 30 days and check your registration details.

  2. After email verification and required details, continue to Razorpay. If you cancel or payment fails, follow the error and retry without paying repeatedly.

  3. Wait for VIZRO to verify the payment and show the result on the same registration page. A bank debit or checkout message alone is not confirmation.

  4. For successful Live registration, open the password setup email, create your password, then sign in. Test payments do not create a real account or paid access.

This is the real registration payment section, not a successful payment receipt. Live payment and email delivery need a separate real transaction check.

Open this page →

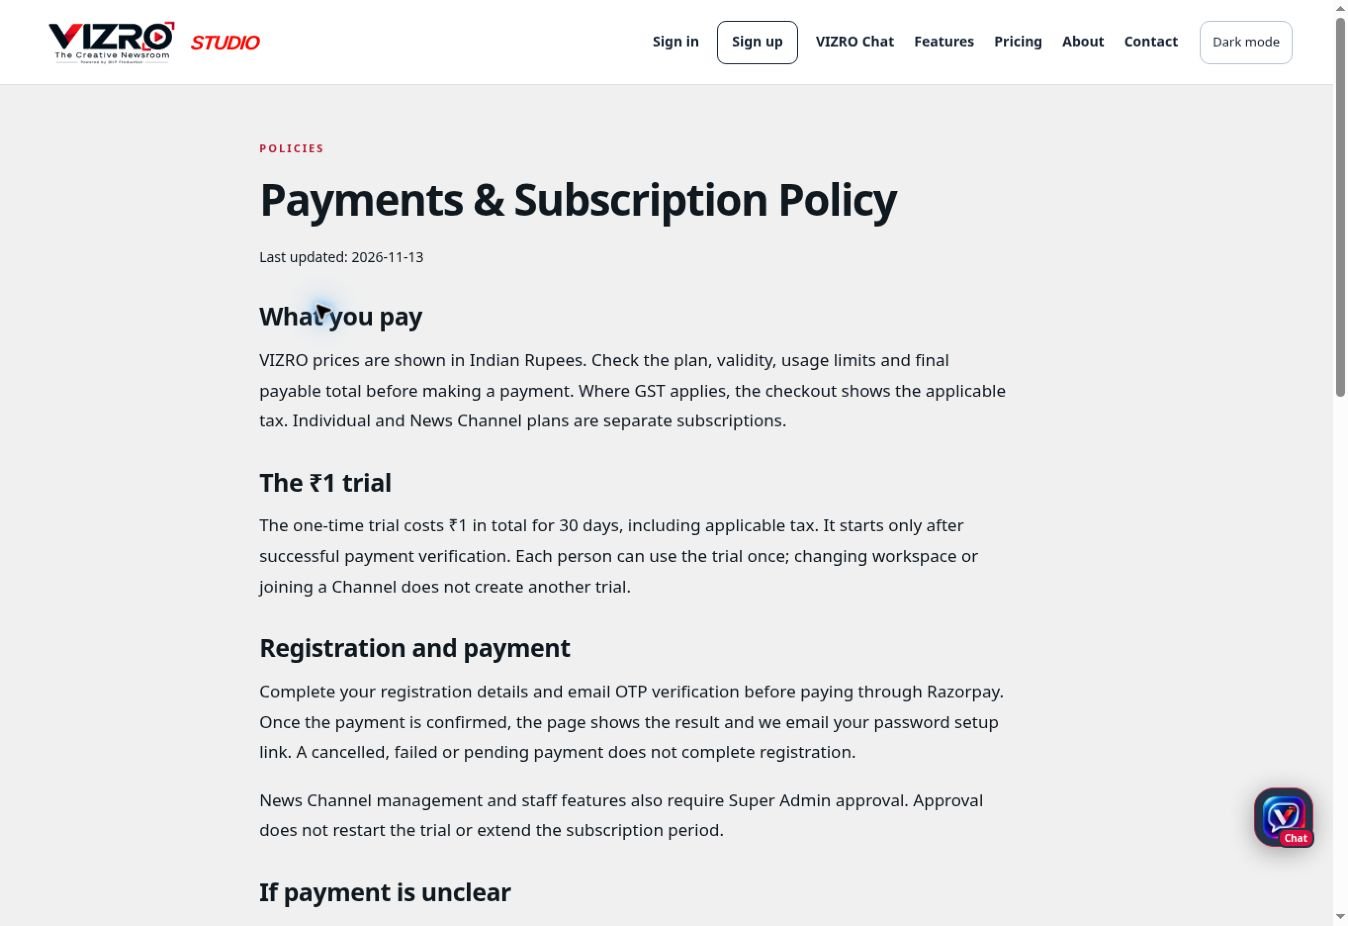
Lesson 5 / 5 · Understand your bill

Actual UI: Understand your bill
  1. Your registered name, email and address supply the bill. Customer GSTIN is optional. Add it before paying if you require a business invoice.

  2. For a verified payment, the billing system prepares the invoice PDF and emails it to the billing email. Check Spam and ask Support if it is missing.

  3. An already-issued invoice keeps its original details. Contact Support for a correction; changing your profile does not rewrite old bills.

The screenshot is the public payment policy. Private customer invoices and tax identifiers are not shown.

Open this page →

Follow the updated screenshots and steps above for this release. Screenshot videos from older releases are not shown here.

বুটামটো টানি স্থান সলনি কৰিব পাৰে। কীব’ৰ্ডৰ কাঁড় চিহ্নৰেও স্থান সলনি কৰিব পাৰে।